it gave me loads of new info to chew over and different ways of aproaching different challenges that i come across.
i have been gardening for a number of years now and welcome any new information on how to do less work and use less water and be more productive.
the idea that everything comming into my area should be multi purpoe really appeals to me. it is something i have been working on on my own for a while and now i have more of a solid foundation of ideas to put into practice.
another concept that really spoke to me is the idea that water should be used as many times as possible before leaving the property or area. again this is something i have been working on for a few years and now have a fuller understanding of what that can mean.
So on top of my current garden project i have added ducklings, chickens. i am almost finished my first duck garden and will begin on the second soon. I also hope to add a couple small small water collection ponds for the ducks, but also just to try out some experiments with gleying and plastic liners.
[Gleying seems to be an old Russian method that mimics the way ponds sometimes form in nature. The goal is to produce an anaerobic layer in the soil underneath the pond, which somehow prevents water from percolating through
There is lots of information out there on permaculture, design, swale gardens. so if you are confused by what i am showing you but initerested i suggest that you do a bit of reasearch online, pick up a book or email me :)
So the first thing i did was look around where i live.
i needed sunlight [which is sparce around here]
sunlight was my main concern, i get maybe a total of 6-8 hrs on sun on my garden in the height of summer. the rest is shaded through trees. although i do plan on thinning out some of the tall thin stuff this year, there will still be a lot of shade.
so i picked my site for a number of reasons.
- Sun
- its close t the house
- its not being used
- the steep incline and lack of soil makes an excellent eperiment project
- there is a lot of water run off in this area and i want to utalize as much as i can.
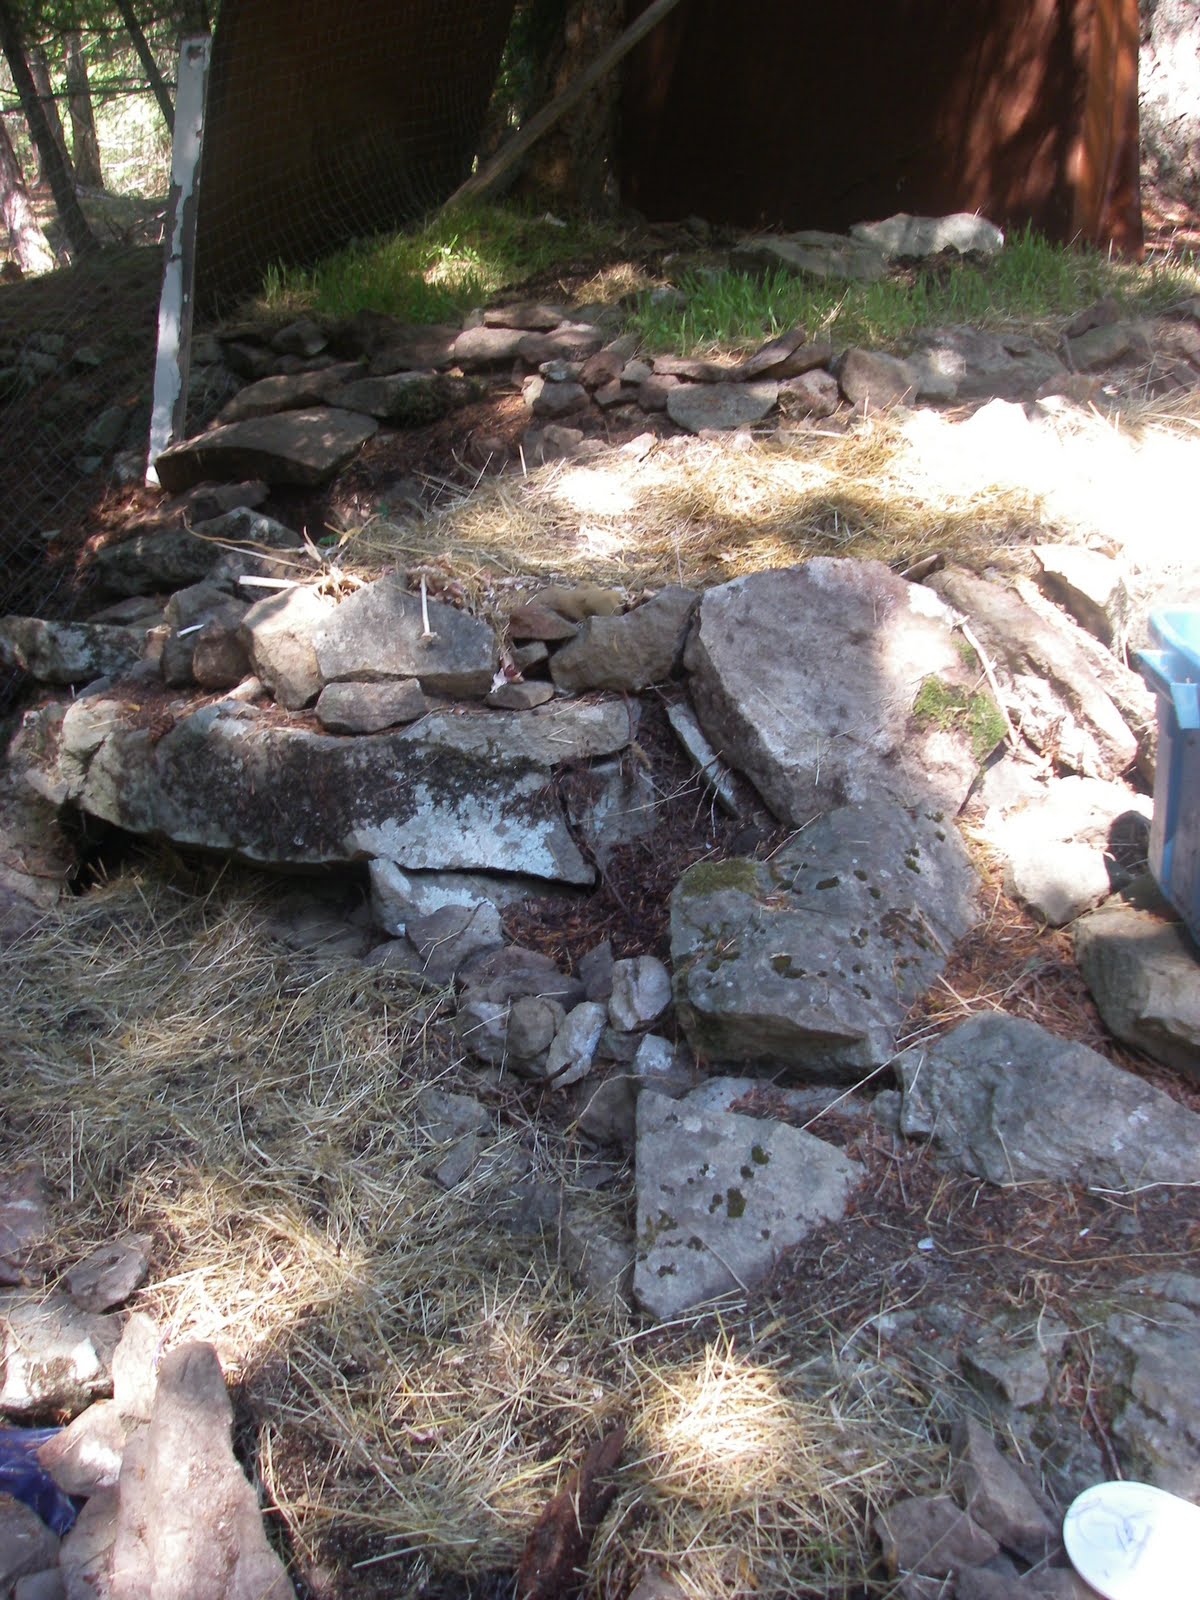
So here are some photos of my progress.
 |
| before i get started - august 2nd |
 |
| the first swale - aug 2nd |
 |
| end of day one |
The swale is designed to have dual function. 1. it is the path. 2 and more important it is the catchment for the bed below it. it is level and distributes the water evenlly to the bedd through the bottom to create a situation where the bed is soaking up the water form the roots up. which will allow for more water storage and [hopefully] less phisical water done by me next spring and summer.
Already this idea is proving true throught the soaked mulch i am building the beds out of, the water rises thruogh evaporation and keeps the soil on top [and seeds] damp :)
i am water some beds and not other to see what the difference is.
i will also build one unsoaked bed to show the comparioson.
 |
| august 8th i see no difference in the bed i water and the bed i dont. rye and radish are coming out. |
 |
| august 8th |
 |
| August 11th- been watering the lower bed with nasty kitchen grey water. but it doesnt seem to mind. |
 |
| august 11th - this bed [in the middle] was done with foam, fabric, press board sticks and ashes. i dont thinkt he seeds like the ashes to be so close. but blu the dog also ran through this bed....who knows... |
 |
| water and seed mulch |
 |
| sewn onto ground, water and no seed mulch |
 |
| no water no seed mulch |
So each bed has been a kind of experiment.
here is what they all are and how they are doing.
[all following mulch materials have been soaked overnight in barrels]
Bed 1
cardboard, straw, soil and manure [2-3 inches of each]
seeds sown; clover plantain radish fallrye
then straw mulch ontop of seeds.
Bed 2
cardboard, carpet, fermenting seaweed, straw, pinch of manure
seeds sown; clover plantain fallrye radish
straw mulch for seeds
Bed 3
cardboard, and paper, straw, dirtmix,
seeds sown; rye clover sunflower pea bean swisschard
dirt cover
Bed 4
material, moldy straw, dirt mix
seeds sown; rye clover plantain pea bean swiss chard
straw mulch for seeds
Bed 5
old rotting fabric, foam, garlic stalk, press board, sticks, straw [pinch], dirt [pinch]
seeds sown; radish kale parsley pea bean sunflower rye clover
straw mulch for seeds. pulled back after 5 days to see if it makes a difference.
Bed 6
8" cardboard, 8" straw, maunre and dirt
seeds sown; a. clover platain dill. b. rye. c. parlsy alfalfa kale radish sunflower
a outside b second row c middle.
straw mulch for seeds
Well i think the ashes are a nasty idea for seeds. maybe mix into compst more or into the straw.
water vs no water seems to make no difference so far. mulch makes for a posotive change in growth and sewing straght to the rocky ground works but not well. will wait and see how the mulch vs no mulch effects the plants we havent seen growing yet.
i feel like maybe the fabric holds water longer that the carboard or maybe lets more aire in???
September 1st 2010
so the garden is looking good. not much growth in the last little while. avent bee watering and its been freakin hot. but of course as soon as i do a good and heavy water on monday it rains for the next 24hrs. whatever. at least my wtaer barrels are full again.
the bed that wasnt getting any water at all was looking pretty week.
i also resowed a bunch of seed to fill in the gaps about a week ago.
and i hope to get a bunch more cardboard today and finish taht last bed.
Been contemplating the idea of letting the ducks into a section of that area, let them explore and trim a bit, the let it re grow again. it may be good for the plants....who knows.......